Click read more to see the other easy to make toys....
Showing posts with label Things to make. Show all posts
Sunday, 9 August 2015
Easy DIY Educational toys for 0-1 year olds
I knew before our little Annabelle arrived that I didn't want to fill my house with shiny, loud plastic toys that flashed and sang at the touch of the button, they have their place and Annabelle does enjoy them, but primarily I wanted her toys to be fun and educational, teaching her fine and gross motor skills and teaching her to enjoy learning to work things out and allow her to experience a variety of different materials and textures along the way. Below are a selection of the home made toys I have made her, super easy and cheap to make and she really enjoys playing with them and they have taught her a lot along the way! The cotton reel tub below and the milk bottle top posting box have been her firm favourites for ages now, they keep her happy for ages.
At around 9 months Annabelle developed a LOVE of posting things, I looked it up and kids often have urges to do certain things like posting, or hanging upside down (!) or climbing etc and they are called development schema, you can read more about them on the Nature Play blog here. This toy definitely fed her desire to post and was also very easy to make. All you need are empty cotton reels from ebay or something (ours were painted by her great Grandma when she was in the WI) , and an empty tub with a removable lid (mine was a candy floss tub from Warwick Castle), cut two holes with a scalpel, one so they can go in round end first, and a rectangle hole so they can go in sideways. If I tip these out, she will happily sit there until she has patiently "posted" them all back into the tub. Genius! I stuck the pink coloured card on the lid to give the holes more definition.
Click read more to see the other easy to make toys....
Sunday, 10 May 2015
How to use Bondaweb - Photo tutorial
This tutorial is for my friend Esther! Bondaweb is amazing stuff and enables you to do appliqué so crisp and neatly. So this is a very quick tutorial just to show you how to use it correctly, but the possibilities are endless and can give you such a neat professional finish. (Have a look at my previous post about simple ideas to quickly jazz up a blank T-shirt here)
I love using this to do appliqué onto jersey fabrics especially as they tend to move about when you stitch onto them, but doing it this way the Bondaweb holds the design and the fabric in place. Below are two I have just recently done, one inspired by Fi Fi Lapin and the other is just something I drew.
So if you want to know how to use it, click read more!
Thursday, 5 March 2015
Crochect Chevron Blanket
I have finally finished crocheting my chevron blanket I started more a year ago! It really shouldn't of taken that long to do, but I hadn't decided on a way to finish it and so it has been left incomplete for a long time! As this was the first thing I had really crocheted (apart from the baby shoes) my tension wasn't quite right, and I'm not sure I had the correct hook size for the yarn and so my sides were a bit uneven, and I had also decided to fill in the zig zags at the top and bottom of the blanket which made it very lumpy looking. I thought it really needed something extra to give it a better finish. So after much deliberation I decided to back it in a pale blue jersey fabric and then used matching embroidery thread to hand quilt the back to the front, much quicker and quirkier than other options. I machine stitched the jersey to the front of the blanket to create a border. In hindsight I should of planned the blanket a bit more carefully as the yarn I chose was although very smooth and soft, it was very expensive, and I needed waaaay more yarn than I anticipated! So her is the most expensive blanket I have ever made or been given! If you want to have a go yourself you can find a free pattern here.
|
|
![]() |
So here it is! Its lovely and smooth for Annabelle to play on and because its so heavy it's also nice and warm to use over her in her carseat.
See more after the jump.....
Sunday, 1 March 2015
Jazzing up baby t-shirts
Anabelle is growing very fast and in a bid to save some money I bought some plain t-shirts in the sales, a set of 3 for something like £2. Now that I don't have much time either (babies are quite time consuming !;-) I needed a quick and easy way to jazz them up, so I did some simple animal silhouettes using the wonder of Bondaweb and some cute ditsy print fabric! Wanting to keep traditional I decided to do woodland animals (apart from the Dashund, I just love them!), and found the sillouhettes using google images. I drew the shapes onto the paper side of bondaweb, ironed it onto the back of the fabric and then cut them out. I then ironed them into the t-shirts and stitched round the edge. I'm very pleased with the result, they look super cute and trendy. I will also be posting a "how to" bondaweb for those who want to know how to use it properly. Let me know what you think!
Wednesday, 28 January 2015
Easy Baby Teether!
So just recently Annabelle has been a little on he grizzly side and since her friend Jospeh (who is only one month older) cut his first tooth around her age I was beginning to wonder if the dreaded toothy pegs would be cutting through! She seems to like sucking on my cardi and other fabric things so I wanted something that was fabric and hard so it would be good to teeth on and this is what I came up with. Hope you enjoy making it, it only took me about 20minutes.
Friday, 20 June 2014
Oven glove tutorial and free pattern
I have made a pattern for these oven gloves which you can download here and follow the photographs below for how to make them. I hope they make sense! The fabric I used is a cotton print I got from the market (trying very hard to look like a Kath Kidston Print!) and the Bias binding I also got from the haberdashery on the market. It is 2cm wide. You can buy specially made insulating wadding, and I bought some called Insul fleece, I’ve not used it before and was a little dubious about how successful it would be as it’s quite thin. However it can easily be quilted on the machine without any special machine feet but to be honest I think I would double it if I was to do it again as it wasn’t as insulating as I hoped it would be. If you didn’t want to fork out for the more expensive insulation wadding you could instead buy some thick curtain lining, as this is much cheaper and I think would do the job just as well, seen as I use tea towels and all sorts to get hot things out of the oven.
Apologies for the photos not being great, but I took them while showing everyone how to do it!
Photo tutorial after the jump....
Please sign up to receive email updates from me, top right of the web page.
Saturday, 7 June 2014
Baby Car Seat Canopy Tutorial
It was half term a couple of weeks ago so I had some free time on my hands AND some energy which is nice after months of feeling exhausted! I have bought loads of fabric with projects in mind, I think my hubby was getting a little nervous I was never going to use it! So I set about on my first baby sewing project since finding we were pregnant! Can't believe it's taken me this long to get started! I'd seen these types of covers online and decided rather than buy one I thought I'd make one. I've photographed each step so you can make one too. It's super quick and easy and really only took me an afternoon. Think I may knock up some more for my preggers friends!
You will need:
You will need:
- Two pieces of fabric measuring 103cm x86cm for the body and lining
- 4 bits of fabric measuring 23x8cm for the straps
- Co-ordinating(or contrasting!) machine cotton
- About 20cm of Velcro (hook and loop tape)
Monday, 12 May 2014
Ombre dip dye apron
A couple of weeks ago, I was due to host another crafting session with my growing craft group DCI (Dream Create Inspire!). I had decided that we were going to make aprons, and I had sent out the materials list etc, but when the time came, I had totally forgotten to go out and some fabric for myself! Now I know, I do have boxes and boxes of fabric stashed away, but not large enough bits to make a whole apron out of! Then I remembered under the stairs I had put some old white Ikea curtains that I had already hacked about a bit to re-fashion some curtains......so I took those with me and while I was making it, (pattern to follow shortly) I had a little brain wave to jazz it up a bit. Why not dip dye it!? So that's exactly what I did! Brief "how-to" below the picture.
- First you need to make up the dye as per the instructions on the packet. Use a cold water dye. Ideally in something deep like a bucket.
- Then you need to drench the apron or the product to be dyed in water. It needs to be wet all the way through, then wring it out a bit, but not so its bone dry.
- I dipped the apron in as far as I wanted the Ombre affect to go up the apron, then lifted it out so that just the first 3 or 4 inches or so were still in the dye. Then I suspended the apron from above the bucket, you could use a clothes airer or tape the neck strap to a table with the bucket underneath....
- Its important to keep the apron damp throughout the dying process as the dye gets naturally drawn up the fabric due to osmosis (fancy word!)thats how you get the nice faded out effect rater than a sharp difference between colour and white. To keep it damp, I occasionally poured water from the top of the apron down the front into the bucket.
- I left my apron to sit overnight.
- When you are happy with the dyed effect you need to rinse out the extra dye. BE VERY CAREFUL not to get the dye on parts of the apron you want to keep white! I got blue dye on my waist straps and the neck which was really annoying! Run it under hot and cold water alternately until the water runs clear, then hang it out to dry.
- I then ironed mine to seal the dye in and to get all the creases out. Ta-da!
Thursday, 6 March 2014
A winter scarf
Well it really has been a very long time since my last post! The weather has changed a lot and I really hate the cold, makes me very grumpy! I do really like scarves though! I had been noticing a lot if these long loopy eternity scarves people were wearing and thought to myself it can't be that hard can it?? So with a tiny bit of help from a more experienced knitter, I learnt to cable knit (it really is SO easy)! If you want to make this too there is the pattern and equipment list below the photo.
Size needles:10mm
Super chunky wool (just under 3 balls)
And the pattern below:
Cast on 34 stitches
1st row: (right side) k10 P2 k9 p2 k10
2nd row and every following alternate row: p13 k2 p9 k2 p10
3rd row-As first row
5the row- k10 p2 c9b (See below) P2 k10
7th row: as first row
9th row: as first row
11th row: as first row
12th row: as first row
These 12 rows form pattern
Keeping pattern correct throughout, continue until you have the length you need! Then cast off and sew the two ends together.
To cable: (Slip next 4 sts. Onto cable needle and leave at back of work, k5, then k.4 from cable needle)
Size needles:10mm
Super chunky wool (just under 3 balls)
And the pattern below:
Cast on 34 stitches
1st row: (right side) k10 P2 k9 p2 k10
2nd row and every following alternate row: p13 k2 p9 k2 p10
3rd row-As first row
5the row- k10 p2 c9b (See below) P2 k10
7th row: as first row
9th row: as first row
11th row: as first row
12th row: as first row
These 12 rows form pattern
Keeping pattern correct throughout, continue until you have the length you need! Then cast off and sew the two ends together.
To cable: (Slip next 4 sts. Onto cable needle and leave at back of work, k5, then k.4 from cable needle)
Saturday, 30 November 2013
Christmas Stocking Tutorial and free pattern
Christmas fever is rising in our house! I LOVE Christmas and as we will be away in America for two weeks over Christmas visiting my hubbys Granny and Grandad, I thought I really ought to get the tree and decs up two weeks early in order to enjoy them to their full. You see the logic! In the process of untangling lights, fawning over all our lovely baubles again I found our stockings. The plainer one Dave made for me for our first christmas together and the following year I returned the favour for him with holly trim and buttons.

As people have requested a template for these christmas stockings, I have made two different sizes, 1 large and one small you can down load the Large stocking template here and the smaller stocking template here. I have also done a photo tutorial ( Click "read more") so you can make one too!

As people have requested a template for these christmas stockings, I have made two different sizes, 1 large and one small you can down load the Large stocking template here and the smaller stocking template here. I have also done a photo tutorial ( Click "read more") so you can make one too!
Saturday, 26 October 2013
Maile Cardigan from "What to knit When your Expecting"
I would not call myself an accomplished knitter, but last week, after a not very productive day I got the “creative Itch” and just HAD to make something. I have just recently been “pinning” knitting patterns for baby blankets and cardigans and after conquering crochet I thought I ought to up my knitting skills! I found a lovely, not too complicated pattern for the Maile Cardigan from What to Knit When You Are Expecting ( a great blog on all things knitting (and no I’m not expecting!)) (It’s in a lovely pink on my Pinterest board). The most wool that I had was the remains of a bluebell blue wool, no label, and think it must be an acrylic blend to be honest that my mum had crocheted me a blanket from years ago. I also needed size US4 circular needles which works out to 3.5mm-in between a 9 and 10 in Uk sizes and Lo and behold, I miraculously found a pair of 3.75mm circular needles in my stash so I just used them. I also bought two stitch big stitch holders and some stick markers (in my have colours! coral and mint green! See below) The pattern itself is very easy to follow, however due to the difference between Uk and US stitch abbreviations I did have to rip it all out 4 times, as I just couldn’t get the initial vine pattern correct! To learn the abbreviations that I didn’t know I watched on a You-tube channel from Bernat Yarns and they taught me all that I now know! To be honest I am actually surprised at how easy it is to create the lace patterns when you just follow the pattern it just appears! I did have to cross of each stitch as I went so that I didn’t get confused, I’m rubbish at counting and so I also retyped out sections of the pattern to include the purl rows as I can never remember what number row I am on or have just done! I am really pleased with the finished outcome! I think if I was to do it again I would like to do it in a nicer wool, as the synthetic wool that I had will probably bobble over time. Also I think I made the sleeves a little too long, so in the photos you can see I have folded up the ends. Oh and I miscounted where to put the button holes, so ended up with one too many and in the slightly wrong place! BUT for now, as it’s my first attempt at complex knitting I am pumped and can’t wait to knit something else! Let me know what you think!
Tuesday, 1 October 2013
Dribble bibs DIY
In the evenings I love doing little sewing projects using the scraps of fabric from my stash. Recently as you are aware I have been making loads of baby things, mostly because they don't require a lot of fabric or time, in fact i can usually knock something up in an hour or so. SO satisfying! I had already made several Baprons (funny word I know!) from Craftiness is not optional I downloaded the pattern and I have made mine using scraps of oil cloth to make them wipe clean. Then Dribble bibs caught my eye as they are SO simple, quick and make great presents, especially as the idea is the kid keeps them on throughout the day while teething to stop their clothes getting soggy and making their necks sore. Ideally I think they would be best made from jersey cotton with some micro terry on the reverse for absorbency. I have looked EVERYWHERE online and no-where in the UK as far as I can see sells Micro terry (which is like normal Terry towelling but tiny loops of fibre). The market near me sells the normal white terry towelling for something like £6 a metre. I bought half and have made over 10 I reckon. I made the pattern from drawing round one bib I borrowed. Below are the photos and you will see the co-ordinating headbands we made too! You can download the PDF pattern HERE.
Please do sign up to receive email updates from this blog, top right of this web page.
Here you can see the different fastenings I used, the shop bought ones tend to have the press stud set up-simiar to those of baby grows. I only had the sew on one and I just used 3 parts, in stead of two pairs, in order to give different size settings. The blue one is fastened with Velrco which makes the sizing much more flexible, I made sure to put the scratchy side so it will always be facing up and wont eve touch the skin.
This is the shape of the bib when it is undone.
Here you can see the front and back of the bib. Ideally I would of used micro Terry as the Towelling I have used is quite bulky, but it wont really affect how the bib works, It would just look more professional with the smaller loops.
Thanks for viewing this. Please feel free to browse the rest of my blog or sign up for email updates.
You might also be interested in:
Wednesday, 17 July 2013
Envelope needle case tutorial
The other day on Pinterest I was looking for a small sewing project to do with the girls from DCI (Dream Create Inspire craft group I teach at) and I came across this super cute needle case in the style of an envelope. I searched high and low for the tutorial but I couldn't find one so I thought I would have a go myself. This is my first tutorial so please bare with me! The photography isn't amazing and artistic, It's just done on my Iphone so apologies for that! If you find anything confusing or unclear, please write a comment at the bottom of this post and ill try and rectify it for you! Any feedback is appreciated!
Equipment and materials:
- Medium weight Interfacing
- Felt
- Plain fabric
- Patterned fabric
- Pinking Shears
- 1 Press stud/ Popper
![]() |
You also need to cut one out of a medium weight interfacing. I like to use the iron on sort as it doesn't slip about! this will be used to stiffen the case and give it better structure. |
![]() |
Now to cut out the felt pages for the inside of the booklet, again I just folded the flaps of the template in and then cut out a rectangle about 1.5cm smaller than the folded template. |
![]() |
Fold the felt to find out where the middle is and then using straight stitch just sew it straight down the middle. |
![]() |
So here is the finished one! You can see the little doggy I Bondawebed and then stitched on. A little squiffy, but not too bad. |
![]() |
| And here it is Half open so you can see how to fold it up! |
I hope that is pretty clear-if not-write a comment and Ill answer ASAP. O and I'd love to see your results if you have a go! ENJOY!
Friday, 10 August 2012
New top-from simplicity pattern
Just before we went away I ordered a new pattern for some really simple tops. It's one basic blouse pattern with different ways of decorating them. I have two tops in mind, a combination of the yellow top but with sleeves in white and blue print and then the orange top C in a dark blue seersucker. Ill let you know how I get on.
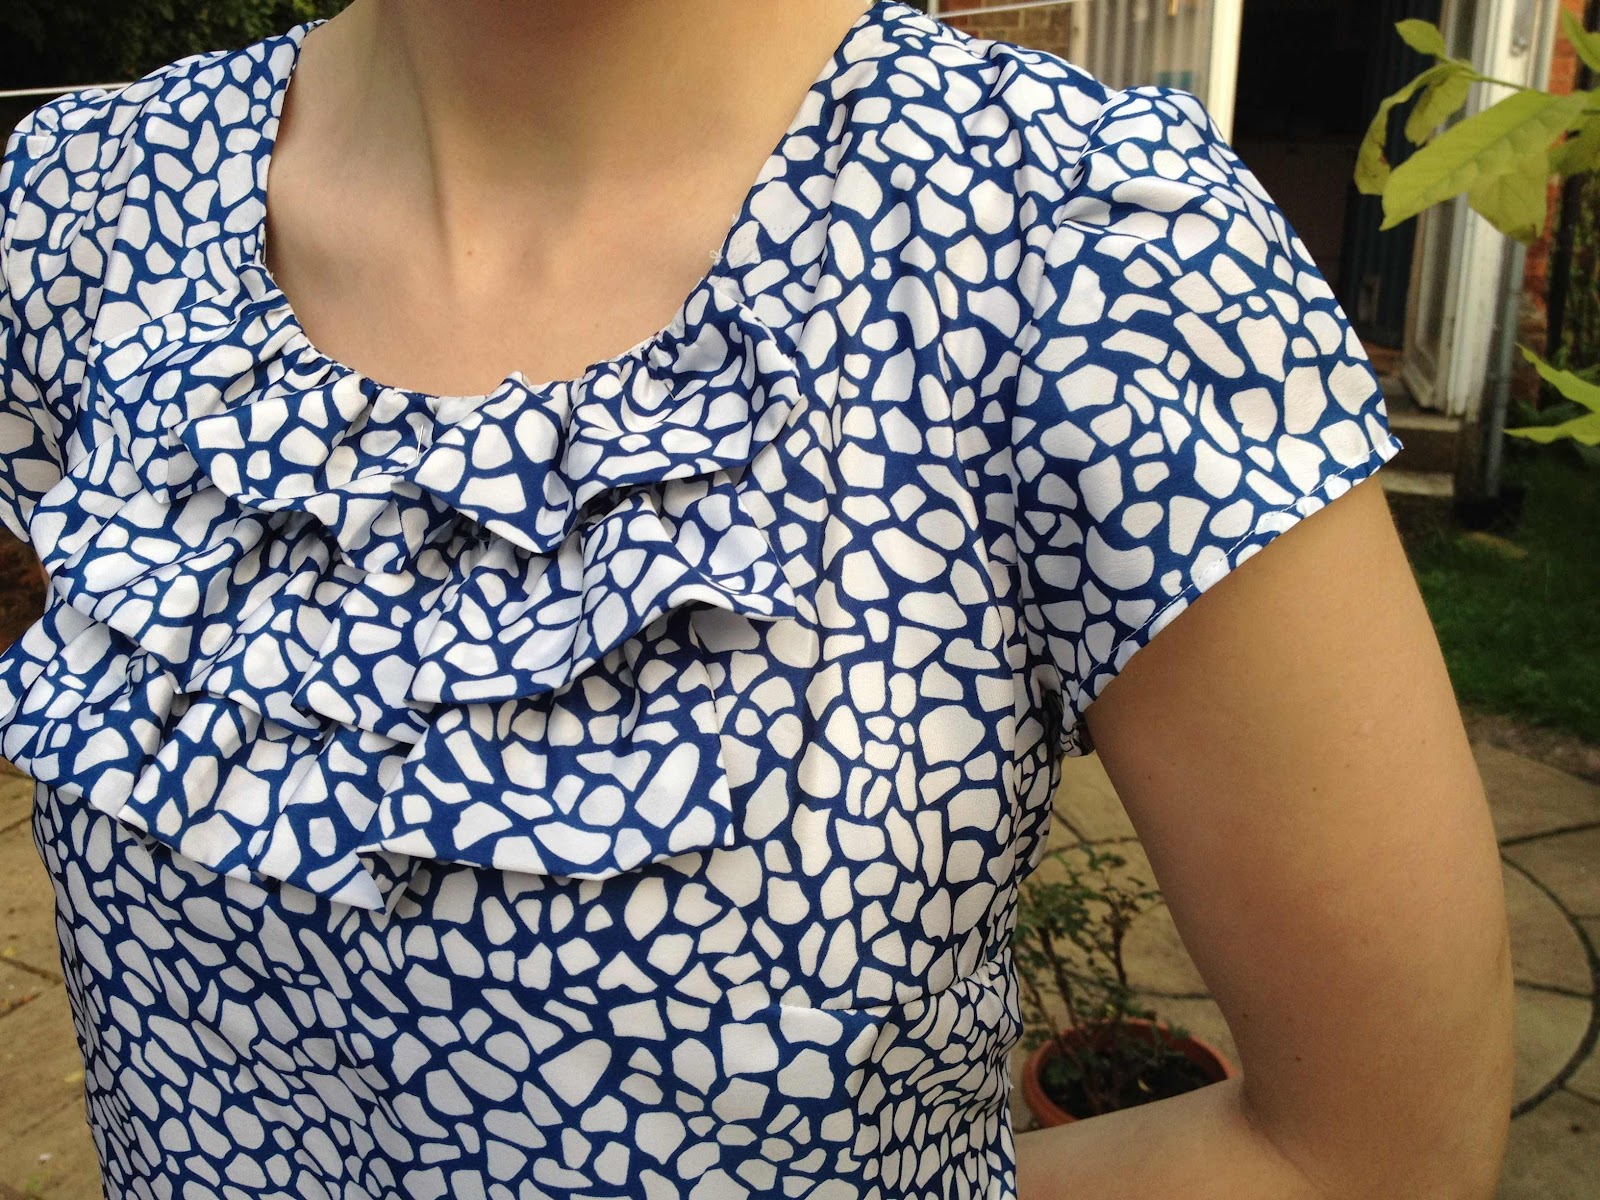
Started just after lunch and was finished before dinner time! Can't believe it! Im so happy with how it came out. I decided to cut out the size 12 pattern, because let's face it I'm not going to get any smaller! However the 12 was very generous and so I have taken it in at the side, also at the back and didn't bother with the button closure as it its right over my head anyway. Very very pleased with myself.
Subscribe to:
Posts (Atom)